


Briefing Your First Classic Game, Pt. 1
Just the Facts

In my last post, I talked about the casebook method for learning law and how, through studying instructive cases, law students develop the skill of “thinking like a lawyer.” And I suggested that a similar approach can help chess players develop the skill of “thinking like a chess player.” This approach involves not only studying instructive games, but, specifically, studying them like a law student preparing for a 1L class.
To illustrate what this looks like, we’ll start with a game by one of the most instructive masters of all time, José Raúl Capablanca, specifically, the final game of his 1909 match against Frank Marshall.
When studying a case for law school, the first step is to read the case to get a sense of what happened and to summarize it in your own words. And that’s what we’re going to do with this game.
In a minute, I’ll give you a link to the game. All you need to do is click through the moves of the game from beginning to end. Before you start, though, here are a few instructions:
Click through the game at a fairly rapid pace; your first pass through shouldn’t take more than a minute or so.
While you click through, make sure that the engine and the evaluation bar are turned off! You’re not evaluating yet which moves are good or bad. Your job at this stage is just to get a grip on the facts—what happened on the board.
Don’t stop to explore variations. In fact, try not to even think of variations. Instead, think about the moves in the game as the facts of a legal dispute. They are simply given.
Don’t worry if you don’t understand a move. We’ll do a deep dive later to understand the game move by move, but right now you’re just getting the big picture.
With those instructions out of the way, here’s the game:
Who won?
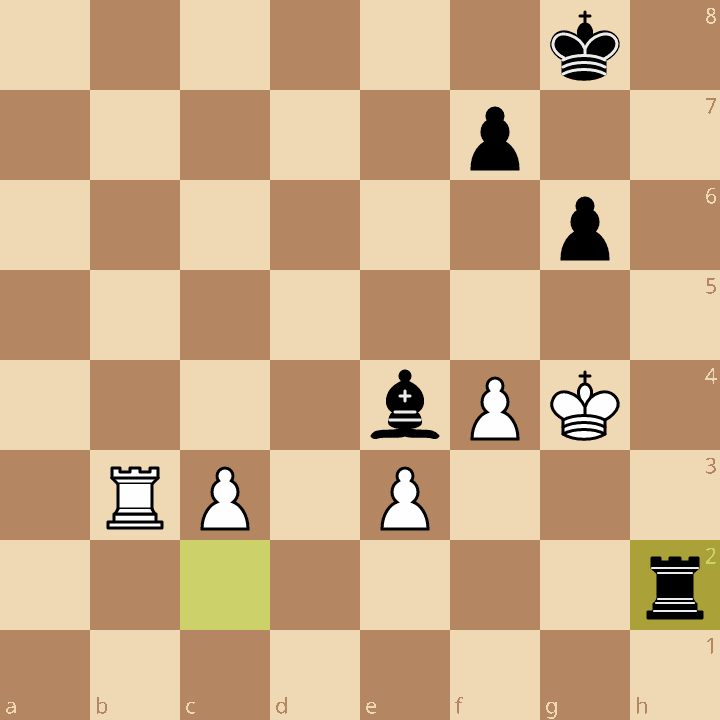
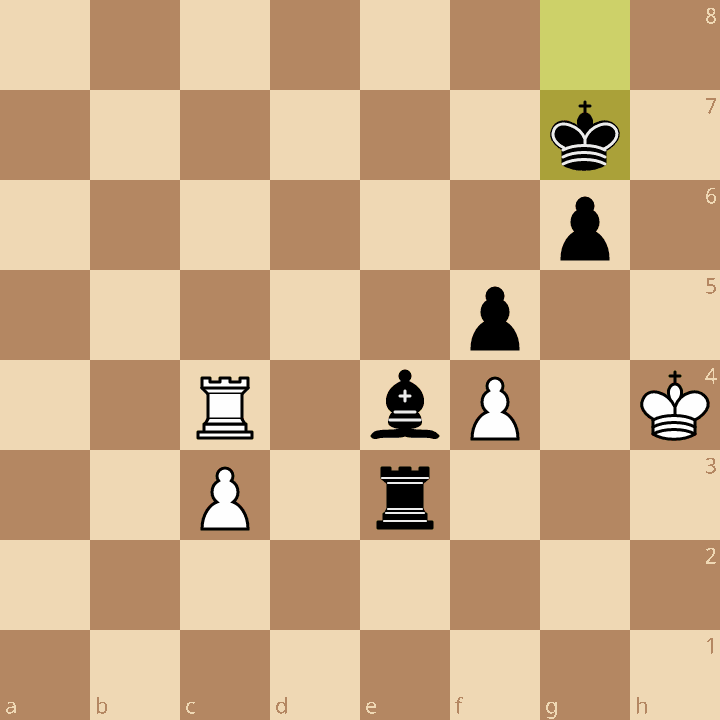
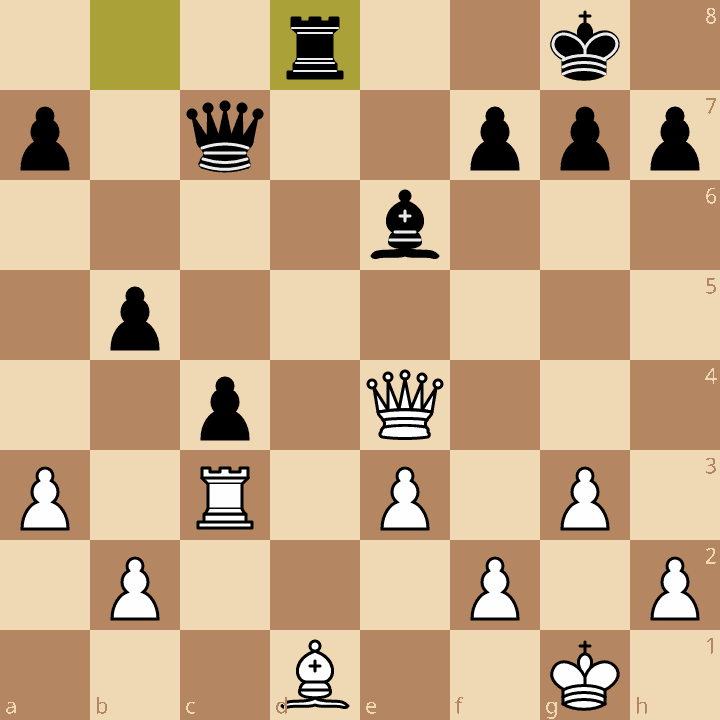
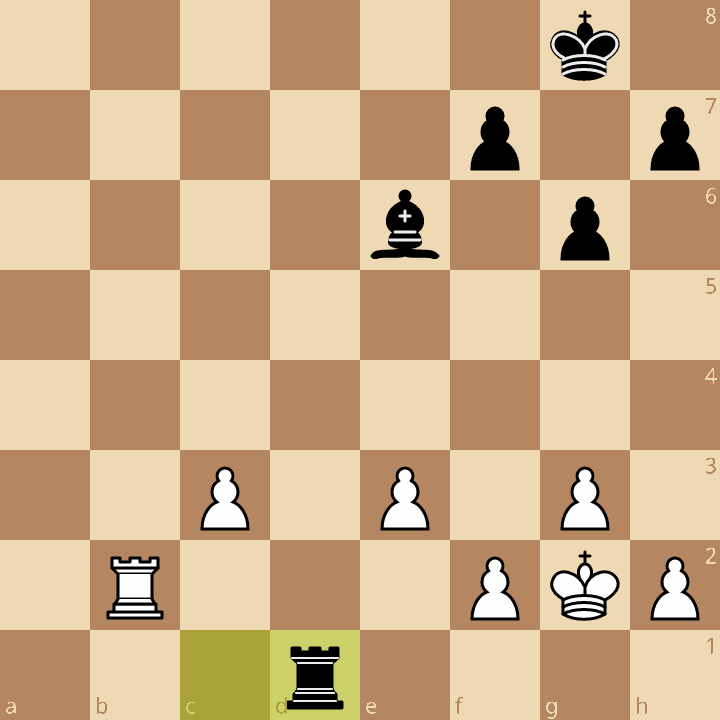
Now that you’ve been through the game once, you may not understand much of it, but you at least know that Capablanca prevailed. Specifically, Marshall resigned in the following position:

The first question to ask yourself is: Do I understand that outcome? What convinced Marshall that all hope was lost?
In some games this can be pretty tricky to figure out. It’s important that you try, though, because if you don’t understand why defeat was inevitable, you won’t be able to do the rest of this exercise.
If you’re not sure, it helps to remember that there are really only three ways to have a hopelessly lost position: Your opponent can have a forced checkmate, your opponent can have a forced win of material that will inevitably lead to checkmate, or your opponent can have a theoretically won endgame, which will allow promotion and eventual forced checkmate.
So which of these did Capablanca have?
Here, Marshall’s king is trapped in a mating net and Capablanca has a forced mate in five. Try to figure out the checkmate for yourself (I’ll put the answer at the bottom).
What Happened?
Now that you know who won, the next step is to summarize the case, which involves telling the story of what happened between the beginning (a Queen’s Gambit Declined) and the end (resignation in the face of forced mate). This summary will be the first draft of your “brief” of the game.
At this stage, we’re still just trying to summarize what happened, without getting too bogged down in why it happened. Right now you’re just a witness. So click through the game again, stopping every few moves to see whether there have been significant changes in the position.
Describe what you see on the board in plain language. You want to use words here, not move notation. It’s okay to use chess terminology and to name key squares, ranks, files, or diagonals, but no move notation.
I encourage you to do this on your own before you proceed. Here’s the link again:
In the next section, I’ll post some key positions and describe what happened in the game as I saw it. You’ll see that this brief is not comprehensive. I don’t describe every move and there are big gaps, particularly in the opening.
What I Saw on the Board
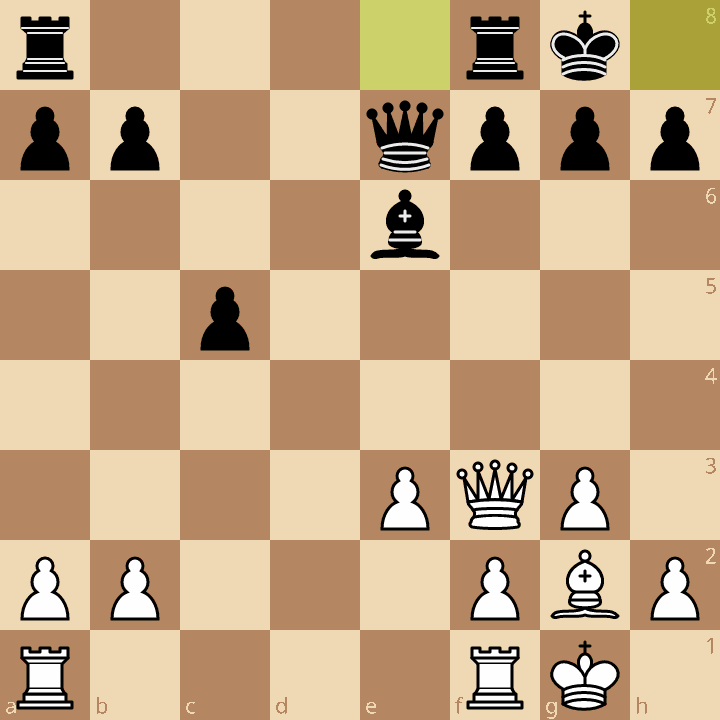
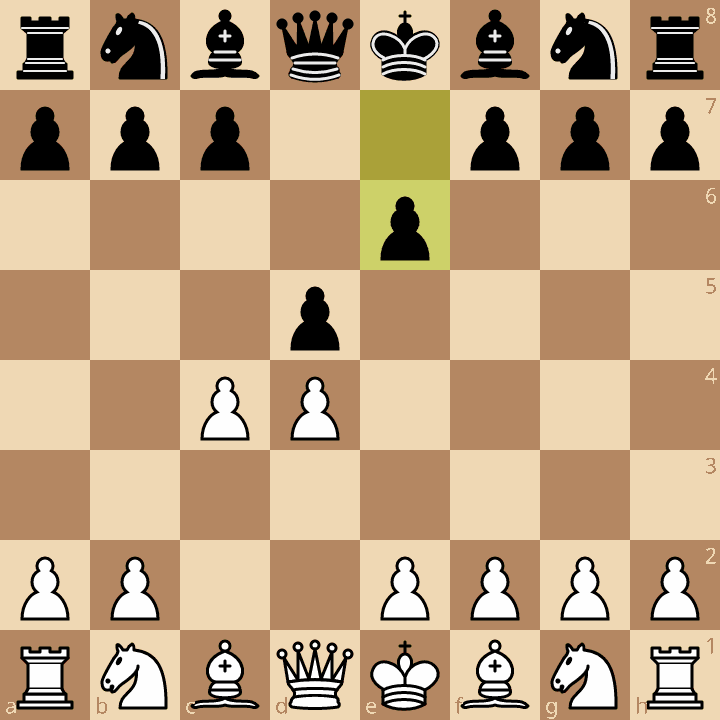
Marshall v. Capablanca arose out of a Queen’s Gambit Declined:

After a series of exchanges, the parties entered a middlegame in which Black had a queenside pawn majority. Both sides had light-square bishops, with White’s bishop fianchettoed on the kingside. There was an open d-file that was not yet claimed by either side:
Black advanced his pawn majority down the board, where it was supported by his bishop:

Black took control of the open d-file with his rooks:

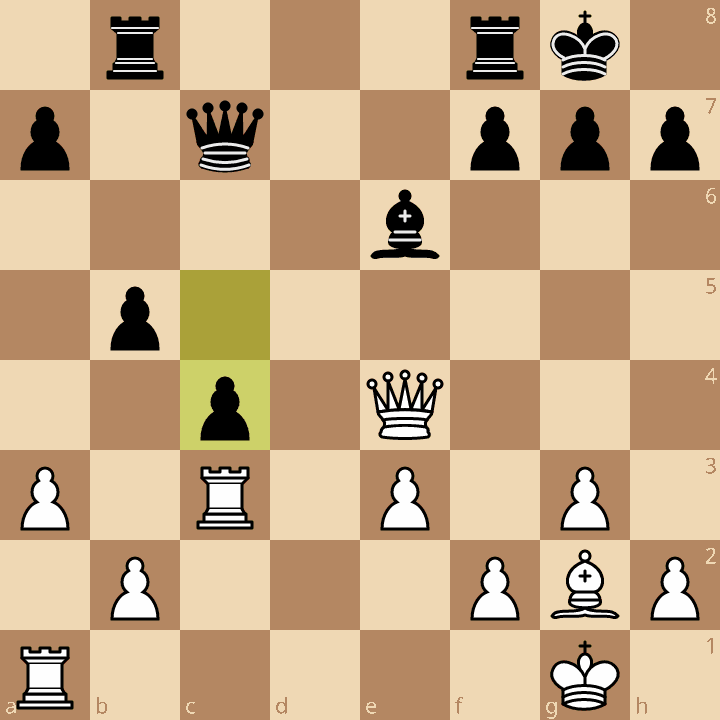
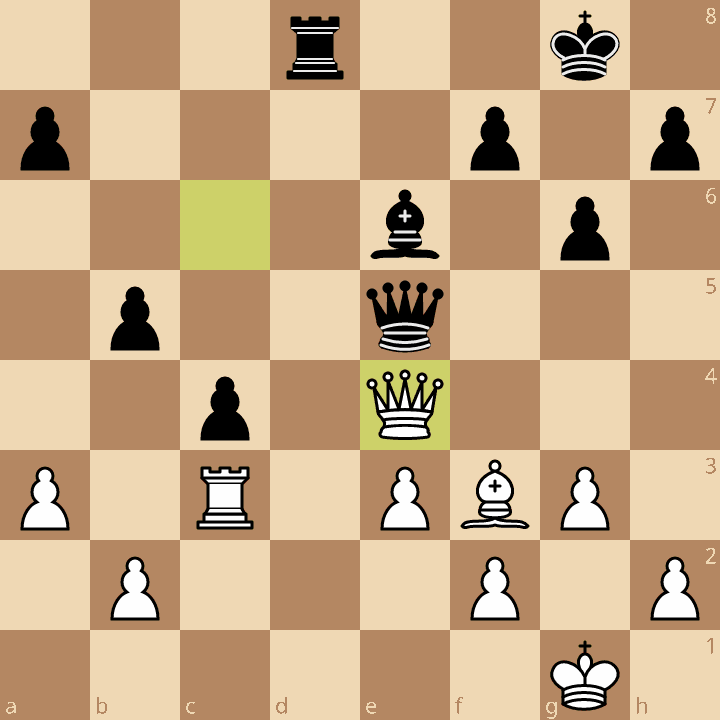
White offered an exchange of queens:
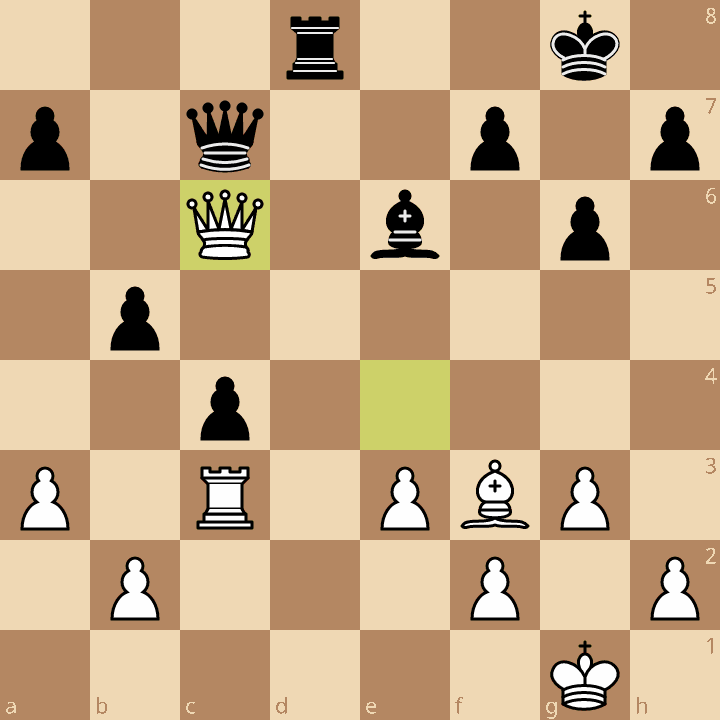
. . . which Black declined. Instead, Black forced the exchange on a different square:

Black’s rook infiltrated White’s position down the open d-file:

Black then continued to advance his pawn majority down the board:

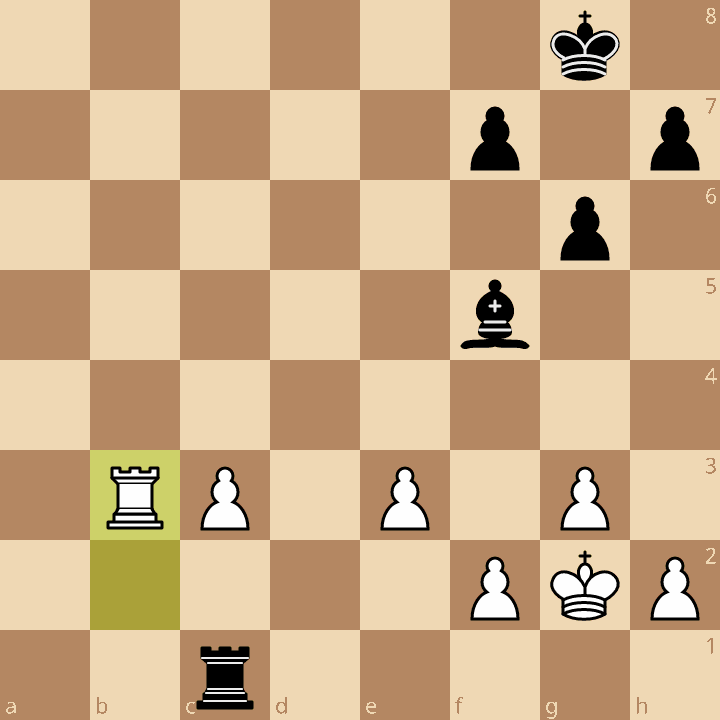
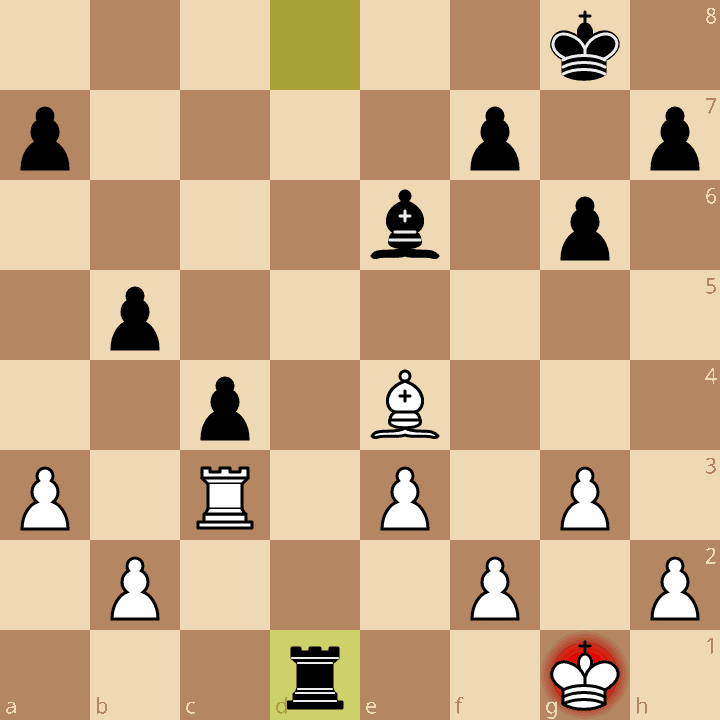
Eventually, Black exchanged his advanced pawn majority for White’s bishop, gaining a material advantage, but giving White a passed pawn:

White could not maintain his rook behind his passed pawn. Black was able to place his rook behind White’s passed pawn, while White’s rook was stuck defending it from the side:
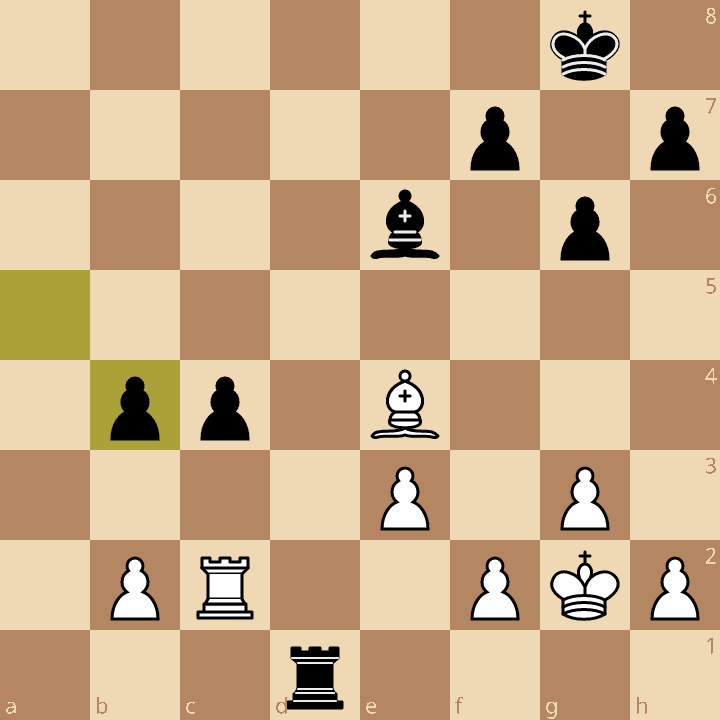
Black used his bishop and rook to attack White’s king’s position via his weak light squares and the second rank:

Black then started pushing his kingside pawns, provoking further weaknesses in White’s position:
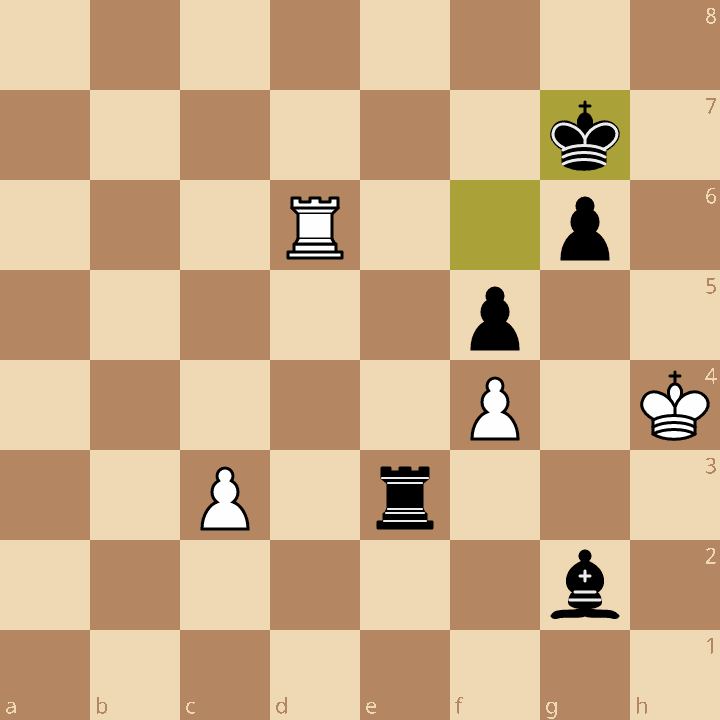
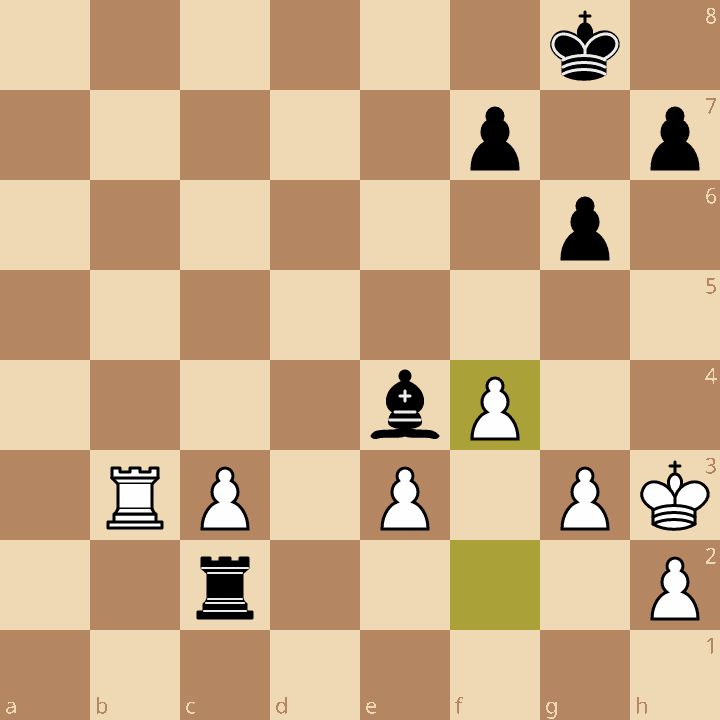
Black then began constructing a mating net:
White, facing forced checkmate, resigned:


With pictures removed, here’s the brief facts in Marshall v. Capablanca:
Marshall v. Capablanca arose out of a Queen’s Gambit Declined. After a series of exchanges, the parties entered a middlegame in which Black had a queenside pawn majority. Both sides had light-square bishops, with White’s bishop fianchettoed on the kingside. There was an open d-file that was not yet claimed by either side.
Black advanced his pawn majority down the board, where it was supported by his bishop. Black took control of the open d-file with his rooks.
White offered an exchange of queens, which Black declined. Instead, Black forced the exchange of a different square. Black’s rook infiltrated White’s position down the open d-file.
Black then continued to advance his pawn majority down the board. Eventually, Black exchanged his advanced pawn majority for White bishop, gaining a material advantage, but giving White a passed pawn.
White could not maintain his rook behind his passed pawn. Black was able to place his rook behind White’s passed pawn, while White’s rook was stuck defending it from the side.
Black used his bishop and rook to attack White’s king position via his weak light squares and the second rank. Black then started pushing his kingside pawns, provoking further weaknesses in White’s position.
Black then began constructing a mating net. White, facing forced checkmate, resigned.
Next Steps
Now we know roughly what happened in Marshall v. Capablanca, and that’s a critical first step to learning something meaningful from the game.
There are still details to fill in, but we already know, for example, that the pedagogical purpose of this game is to illustrate successful play with a queenside pawn majority. We’ve also started to get an inkling for why White lost. Among other things, we can look at what isn’t mentioned in our brief: any counter play by White or any meaningful contribution by his bishop.
Armed with this understanding of what happened, in the next post we’ll start digging into why it happened the way it did. This is where we’ll really begin to understand the lessons to be gleaned from this game. We’ll see how Black’s moves were part of a coherent strategy to make the most of a small middlegame advantage, and we’ll see what mistakes White made that allowed that advantage to grow into an unstoppable checkmating threat.
Speaking of that checkmating threat, if you weren’t able to figure it out, the solution is below.
(Black is threatening 50…Rh3+, 51. Kg4 Rg3+, 52. Kh3 Rg4#. White can delay checkmate for a couple of moves but can’t prevent it. E.g., play could have continued 50. Rd7+ Kh6, 51. Rh7+ Kxh7, 52. Kg5 Kg7, 53. Kh4 (if 53. c4 then Rg3+, 54. Kh4 Rg4#) Rh3+, 54. Kg4 Rg3+, 55. Kh3 Rg4#.)
I just love your method, and I wanna try it with my pupils at the chess club. You revived the study of classical games. Thank you so much! Alex!