


Nimzowitsch v. Capablanca (1913)
An endgame masterclass


Play chess long enough and you’ll pick up “rules” that aren’t really rules. Part of the goal of this blog is to examine those rules more closely through classic games.
This time we’re going to be examining a well-known “rule”: Opposite-colored bishop endgames are drawn. Often, this is true. Because bishops of opposite color cannot contest the same squares, many endgames with opposite-colored bishops end in draws because neither side can advance its pawns to promotion.
That’s surely what Aron Nimzowitsch was hoping for when Capablanca traded into an opposite-colored bishop endgame against him in this game. But as Capablanca proved, there are exceptions to every rule, including this one.
If you’ve done your homework, you’ve already gone through the game a few times and drafted a plain-language summary of what happened. (If you haven’t done that yet, do it before proceeding.)
As you go through the following positions, pay particular attention to Nimzowitsch’s decisions regarding pawns in the opening and middlegame. The weaknesses created in these phases of the game end up being critical to Capablanca’s ability to convert this “drawn” endgame.
Now on to the positions:
Position 1:
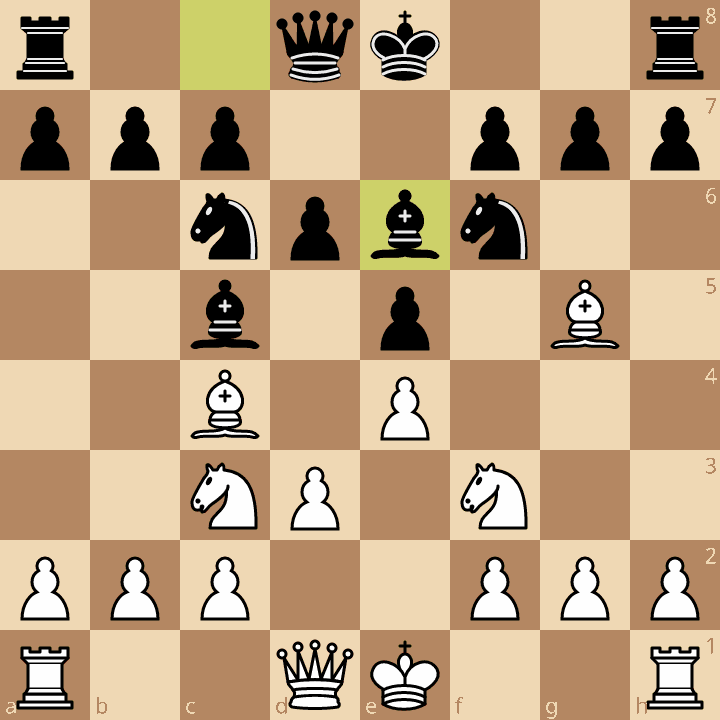
We have an Italian Four Knights on the board. In this position, White played 7. Bb5, spending a tempo to pin Black’s knight to his king. We’ve observed several times that when a player chooses to pin a knight with a bishop, he often commits himself to trading the bishop for the knight. What would White like to get out of that trade that could help compensate for the lost tempo and the loss of the bishop pair?
By pinning Black’s knight to his king, what follow-up move does 7. Bb5 make possible for White? How does Black take the sting out of that follow-up move?
Did White have a better move available to him?
Position 2:
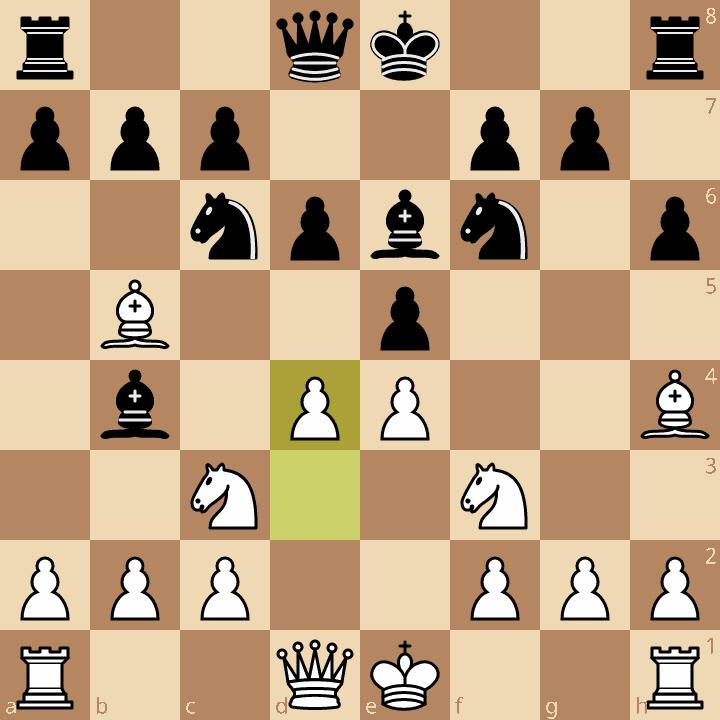
In this position, White has just played 9. d4. What is White threatening?
How can Black meet that threat and deprive White of the benefit of having pinned the knight on c3?
How many pieces are defending/attacking the pawn on e4 (double-check to make sure they’re really defending/attacking it)?
What changes could occur that would make the e4 pawn more vulnerable?
Position 3:
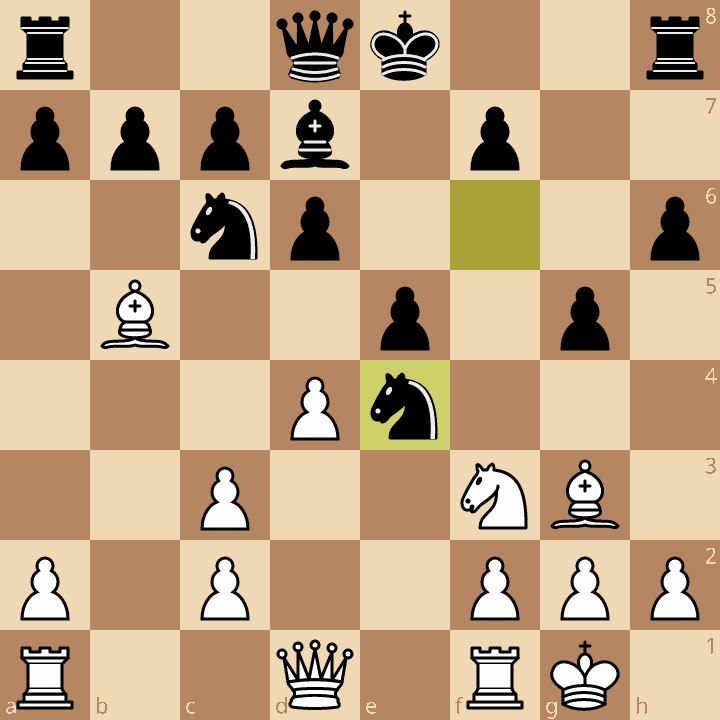
Black has (temporarily) won a pawn on e4 and is threatening Nxc3. What positional compensation does White have?
What are the biggest weaknesses in White’s position? What are the biggest weaknesses in Black’s position?
What color squares are weak on Black’s kingside? How does that weakness relate to White’s earlier decision to play 7. Bb5?
Position 4:
In this position, Black has found an elegant way to defend his king’s rook. But how will Black get his king to safety? What are the long-term benefits of Black’s solution?
In this position, White is threatening to play 17. Bxc7, allowing Black to play 17…Nxc3. Instead, White played 17. Bd4, maintaining the pin on Black’s f6 pawn and the defense of White’s c3 pawn. Which move is better? Why?
Position 5:
After move 20, we arrived at this position. Evaluate the following elements of this position: piece coordination, pawn structure, king safety, king activity, control of the center.
For any positional element where you think one side has an advantage, what decisions earlier in the game contributed to the creation of that advantage?
In this position, White played 21. g4. Does this move address any of White’s positional weaknesses? Does it create any new positional weaknesses?
Position 6:
White has just played 23. Rbd1, connecting his rooks and forming a battery on the d-file. Batteries are usually associated with attack. Did White have another way to connect his rooks more conducive to defense?
What tactic does 23. Rbd1 fail to? How did White’s earlier decision to play 21. g4 contribute to that tactic?
Position 7:
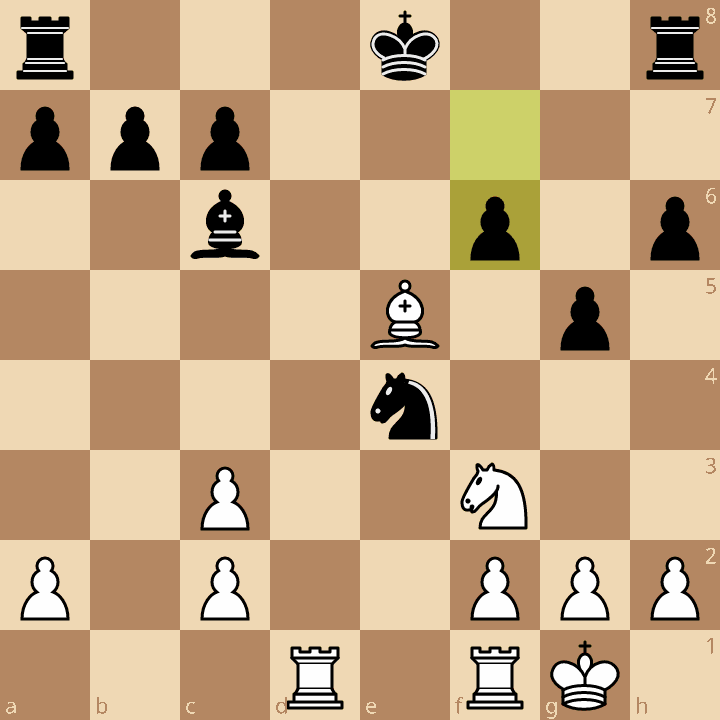
In this position, White has just played 27. Bxf6. Black could have forced a rook endgame with 27…Kxf6. Instead, he played 27…Rd1, forcing the rooks off the board and entering an opposite-colored bishop endgame. What features in the position made Black like his chances in such a notoriously draw-ish endgame?
What else does Black get from forcing the rooks off the board?
Which endgame would you prefer? Which do you think a computer prefers?
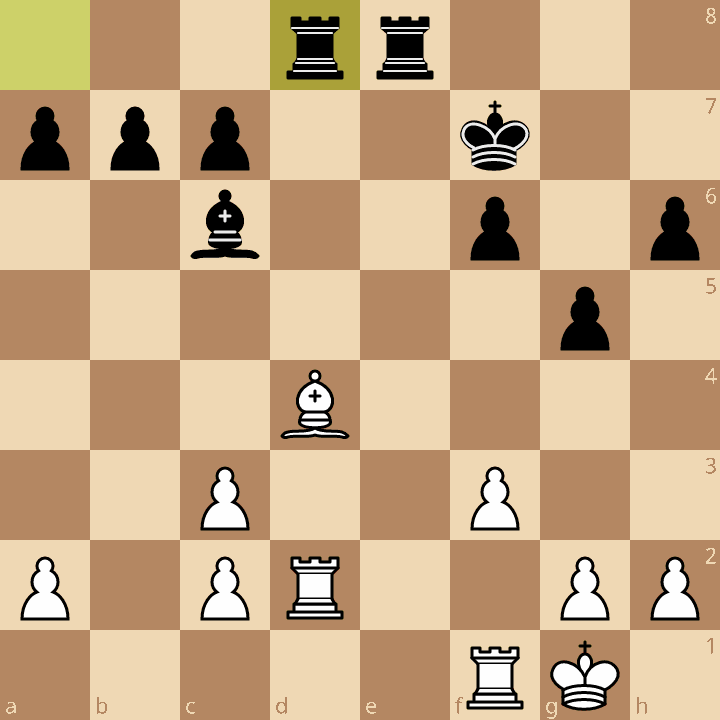
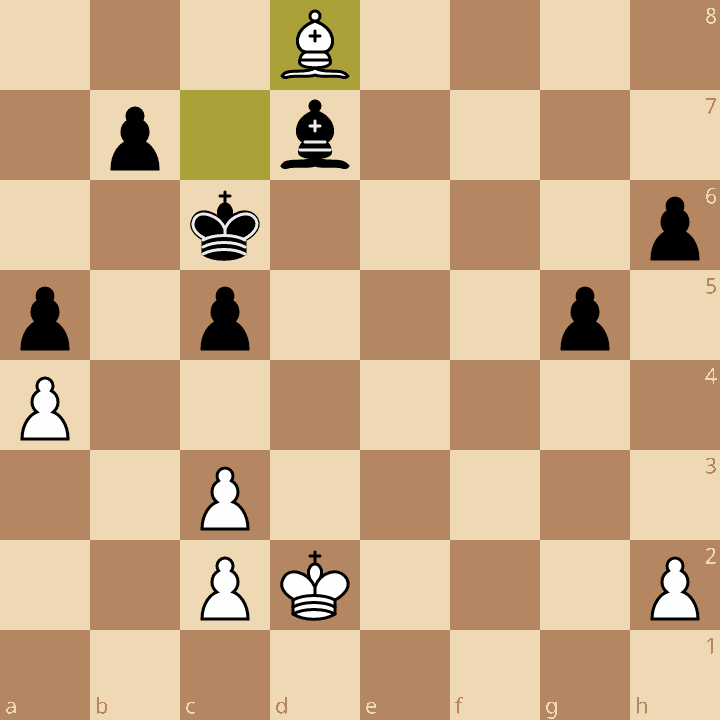
Position 8:
What positional advantages does Black have in this position?
At a high level of generality, what is Black’s plan for converting this endgame?
What is the importance of the move 31…a5? Why is it better than 31…a6?
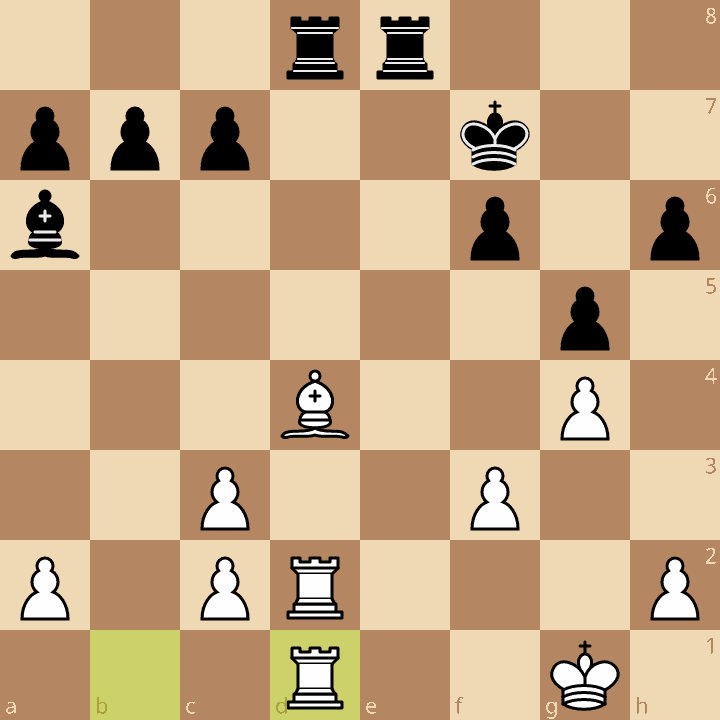
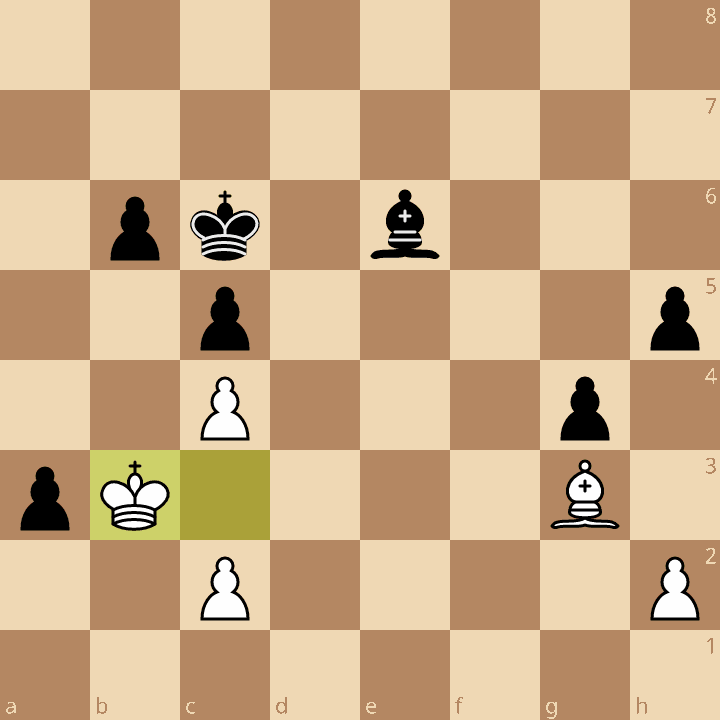
Position 9:
Why did White play 35. Bd8 instead of 35. Bxa5?
Position 10:
In this position, Black played a stunning move. What was it, and why does it work?
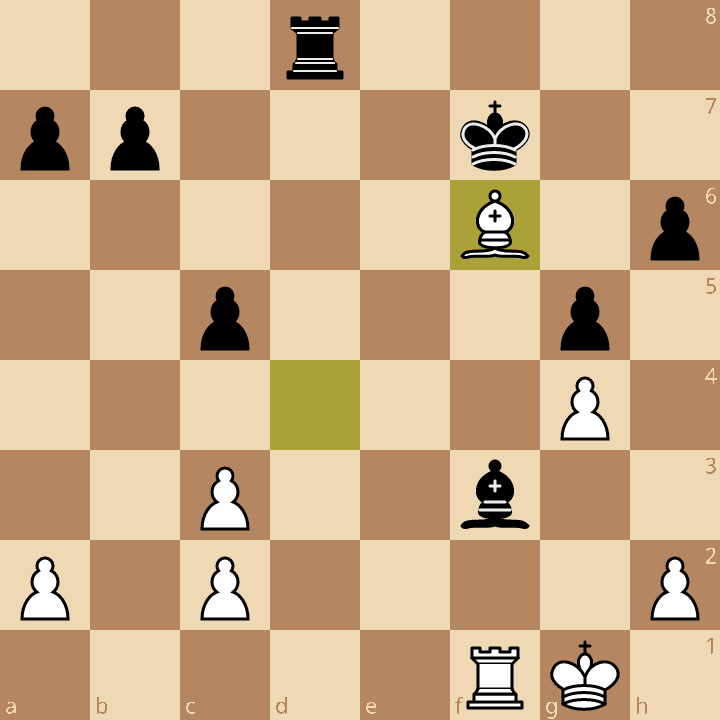
Position 11:
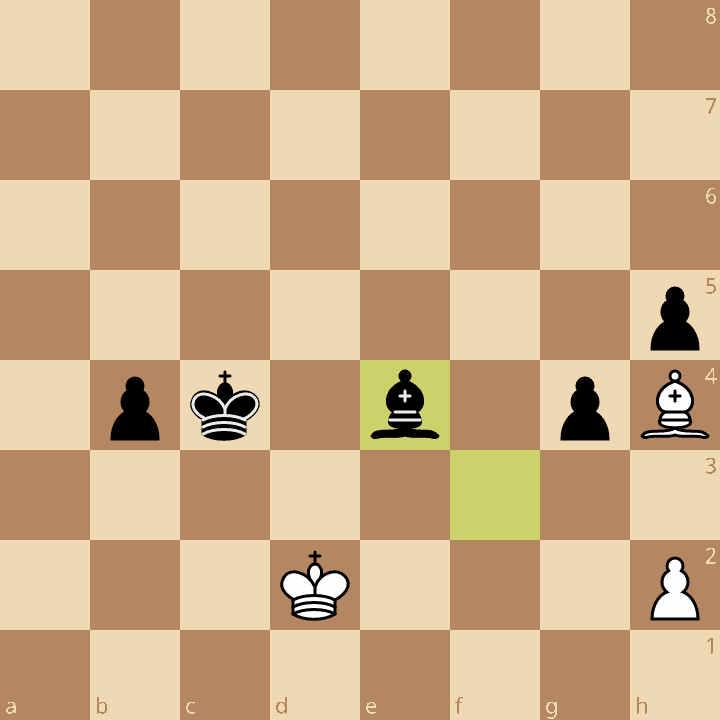
What is the purpose of 54…Be4?
What is White’s dilemma in this position?
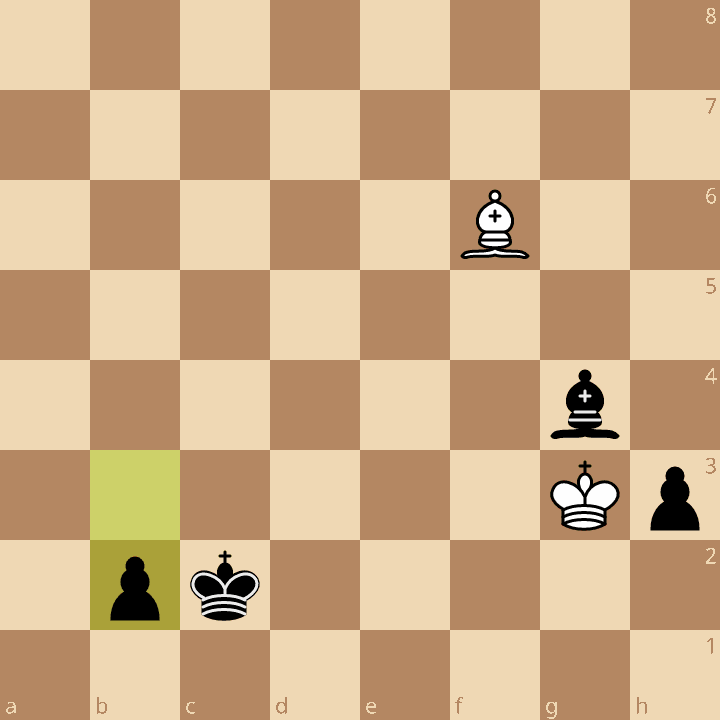
Position 12:
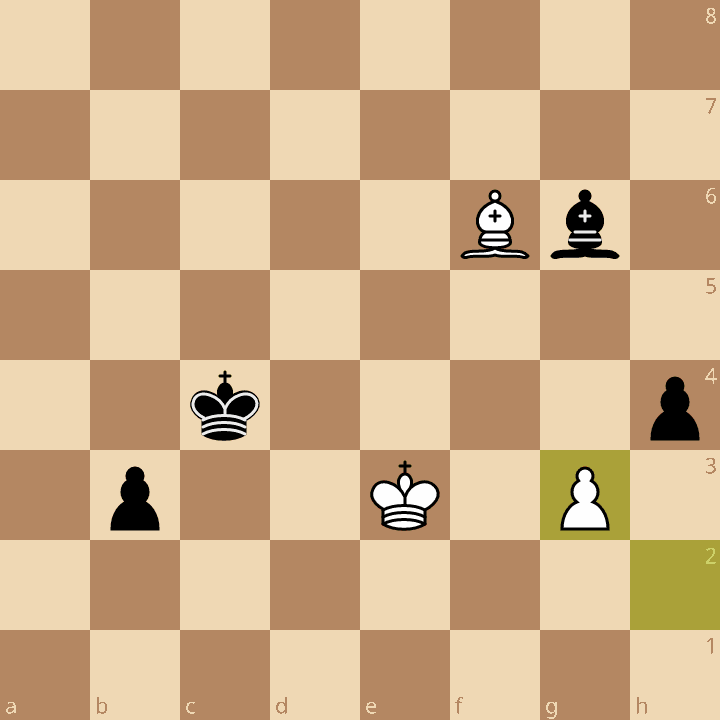
Black is clearly winning, but must play precisely. In this position, Black has only one winning move. What is it and what is the proper continuation?
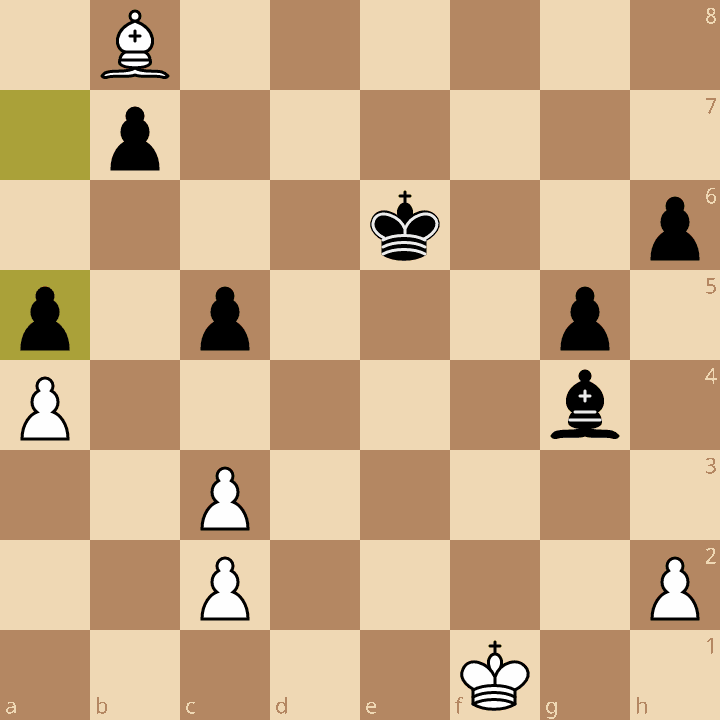
Position 13:
In this position, White resigned. Explain why using words, not variations.
Often, games involving rook pawns are drawn. Why isn’t this endgame drawn? (If you don’t know, you can look in Part 4 of Silman’s Complete Endgame Course or read up on it here.)
Next Steps:
Wow, that was a long one! After you’ve thought through these questions, revisit your factual brief to see if there are material facts you omitted. Update it accordingly.
There’s no need to post all your answers (though you can if you want to). The primary value here is that you practice thinking rigorously about chess positions. But if there are particular answers you’re unsure about, definitely feel free to put them in the comments and we can try to figure it out.
Finally, if you learned something from this game (or two or three things) write it in the comments below!
I love Capablanca. I did not drill down the game but it looks like Nimzowitsch was trading everything to go for a draw and Capa still managed to find the win. Very nice!
BTW, I have to say that I've been using your method to analyze the games from other books (I'm working on Logical Chess at the moment) and it suits me very well. Thank you for sharing!